Jamf Pro 9.98 on Windows- Migrating to MySQL 5.7
Jamf released version 9.98 of its Casper Suite/JSS Jamf Pro management suite last Thursday. The eagle-eyed amongst us may have noticed a change to the system requirements deep within the documentation:

Prior to version 9.98, MySQL 5.7 was not recommended. You’ll likely have MySQL 5.5 or 5.6 installed. I’m running 5.6 and successfully upgraded my Jamf Pro Server to 9.98 in our development/test environment. In the interests of future proofing as well as satisfying my little OCD monster, I decided to migrate to MySQL 5.7 as well. I’m deliberately avoiding the word ‘upgrade’ because it’s more like an uninstall and re-install, with a few steps in between. What follows is how I did it in a Windows Server setting. Surprisingly, Jamf don’t provide much in terms of documentation for this specific activity, but the move to MySQL 5.7 will be something admins will have to consider as Jamf Pro evolves on its way up to version 10.
Let’s set the stage. I’m assuming that we’ve got a single server environment (not clustered) and that we’re running Windows Server 2012R2. I’m also assuming that we’re running MySQL Server 5.6 and the Java JDK 8. We’ve just upgraded our JSS to version 9.98 and the humongous database migration/changes it made were successful and everything is working. That’s good but we want new shiny MySQL Server 5.7 goodness bestowed upon our green and pleasant land. Finally, I’m assuming that your MySQL Server data folder is in the default location (C:\ProgramData). You do have your MySQL database user (default name is jamfsoftware) password to hand, don’t you? You’ll need it later…
Before you begin
There may be other ways to do this - here’s what I did. I’d love to hear from you if you’ve got any comments/suggestions - drop a comment at the bottom of the post!
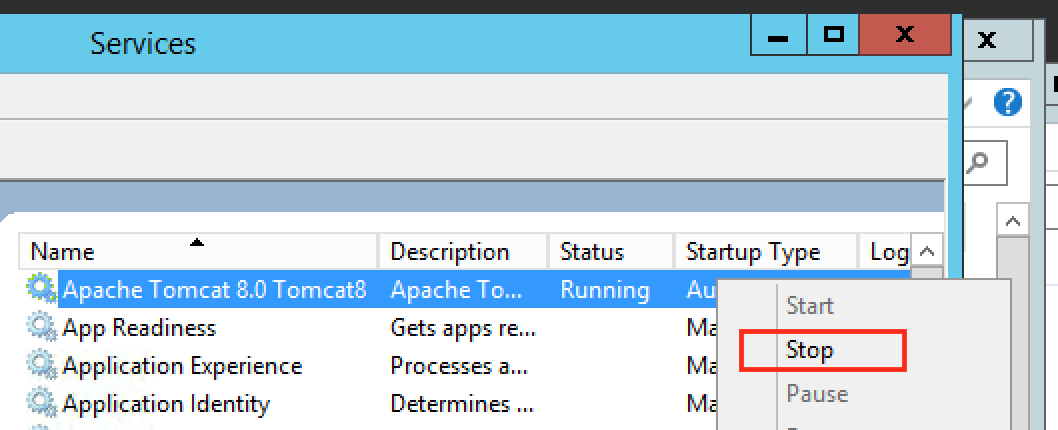
Stop Tomcat’s service first. We don’t want the database being changed whilst we’re working. Click Start, Administrative Tools, then launch the Services application. This is where we can control all the services running on our server. You’ll probably find yourself coming back here quite often… Right-click the “Apache Tomcat 8.0 Tomcat8” service and choose Stop. Wait a moment.
Now, let’s back up our JSS database. Jamf provide a little Java utility for this (I think it uses mysqldump) - if you installed your JSS to the default location, it’s in:
C:\Program Files\JSS\bin\JSSDatabaseUtil.jar
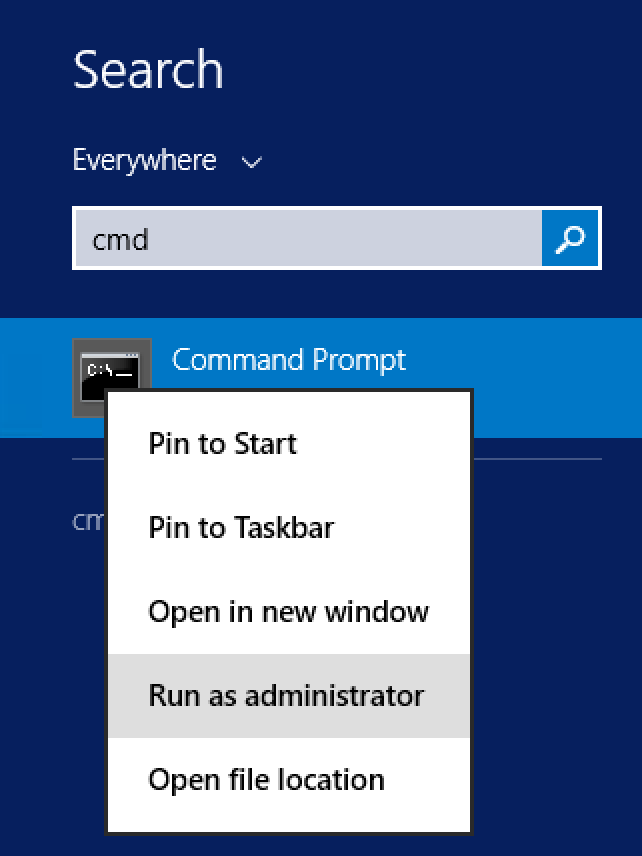
You need to run it with local administrator privileges. I found the only way to do this was to open a Command Prompt as administrator - hit the Start menu and search for ‘cmd’, then right-click and select “Run as administrator”:
Next, issue the following command (assuming that you installed the JSS to the default location):
java -jar "C:\Program Files\JSS\bin\JSSDatabaseUtil.jar"
Handy hint: to make things quicker for next time, stick that command in a text file and save it as ”JSS Database Utility.bat” on your Desktop. Now you only need to right-click that file and select “Run as administrator”.
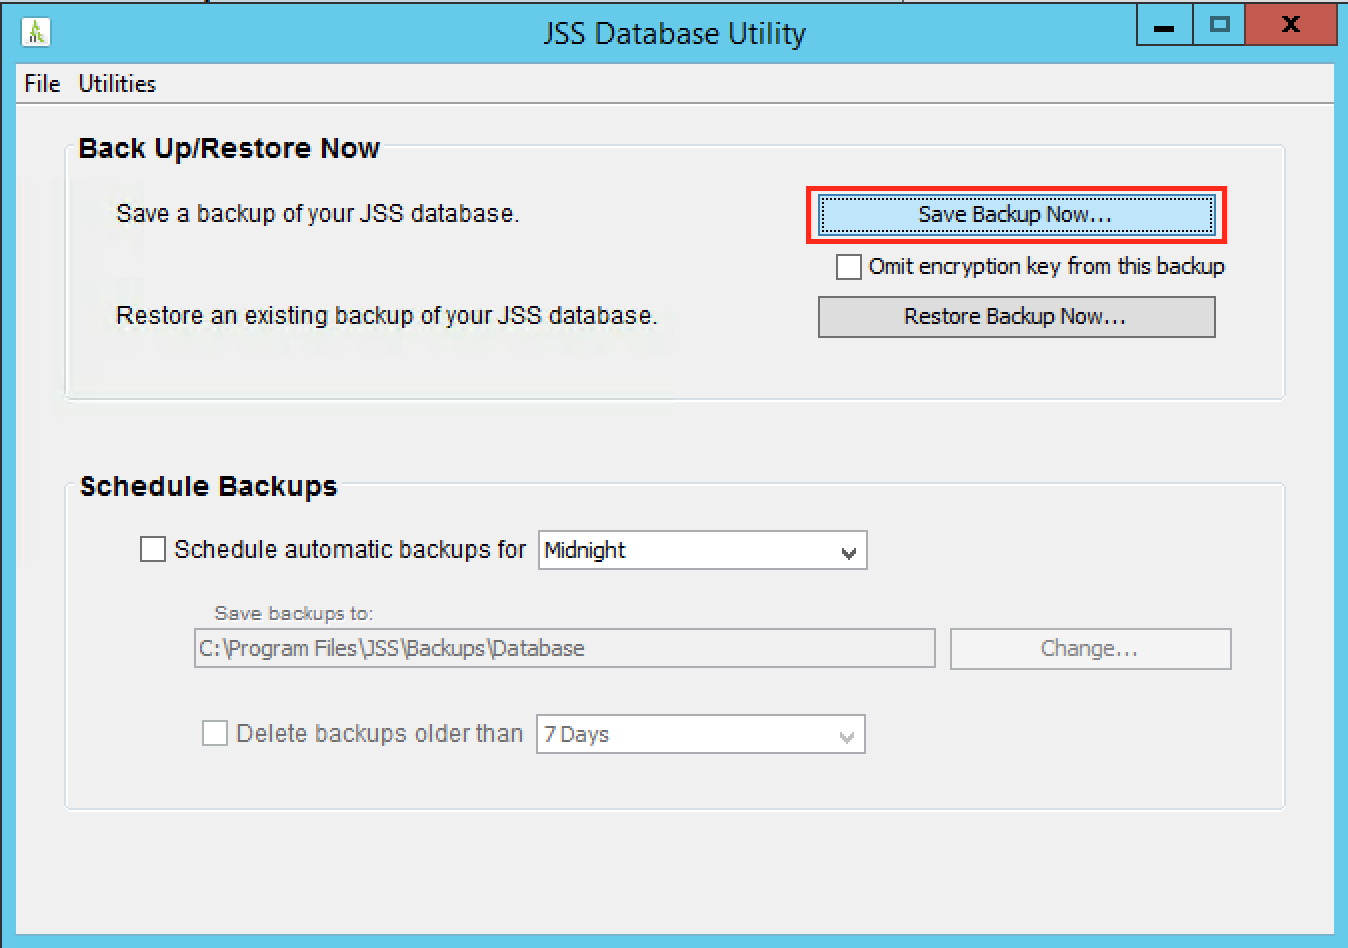
In the Database Utility, click Save Backup Now and choose where you want to save it. This may take a little while depending on the size of your database
Uninstall MySQL Server 5.6
Next, let’s take a copy of our current MySQL settings file, just in case we need to reference it later (folks often alter things here for their specific environment). The default location for it is here:
C:\ProgramData\MySQL\MySQL Server 5.6\my.ini
Now, download the MySQL Server installer from https://dev.mysql.com/downloads/windows/installer/5.7.html - don’t worry about it being 32 bit. That’s just the installer, not MySQL Server!
We’ll use the installer to remove MySQL 5.6 and then install MySQL 5.7. Run the installer - you should see a dialog like this:
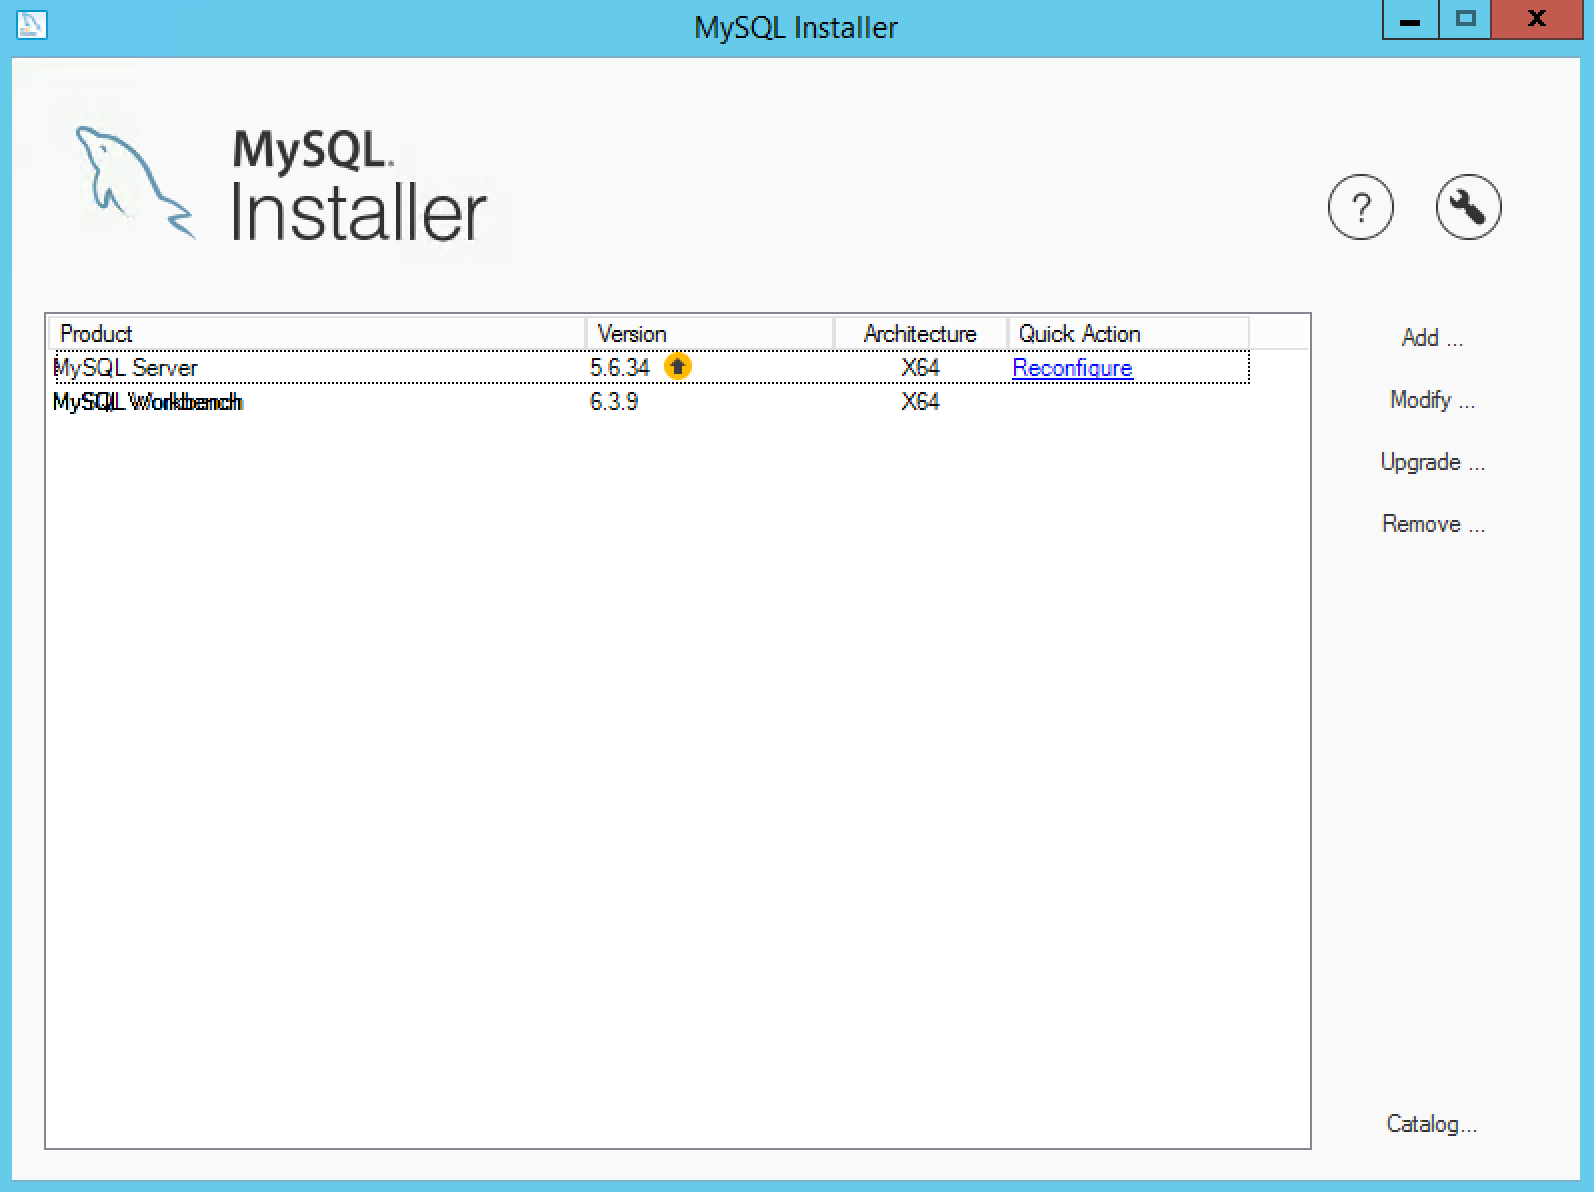
If you’re not running the most up-to-date version of 5.6, you’ll be thrown straight into an upgrade installer for it. Click Cancel to get to the main installer window above. If you are running the most up-to-date version, you won’t see the yellow circle/arrow icon either. Depending on your setup, you may have other items listed - I tend to have Workbench as it’s really useful for monitoring database activity and troubleshooting.
Click the Remove… button.
Tick the “MySQL Server 5.6.xx” entry and click Execute, then confirm that you really are sure.
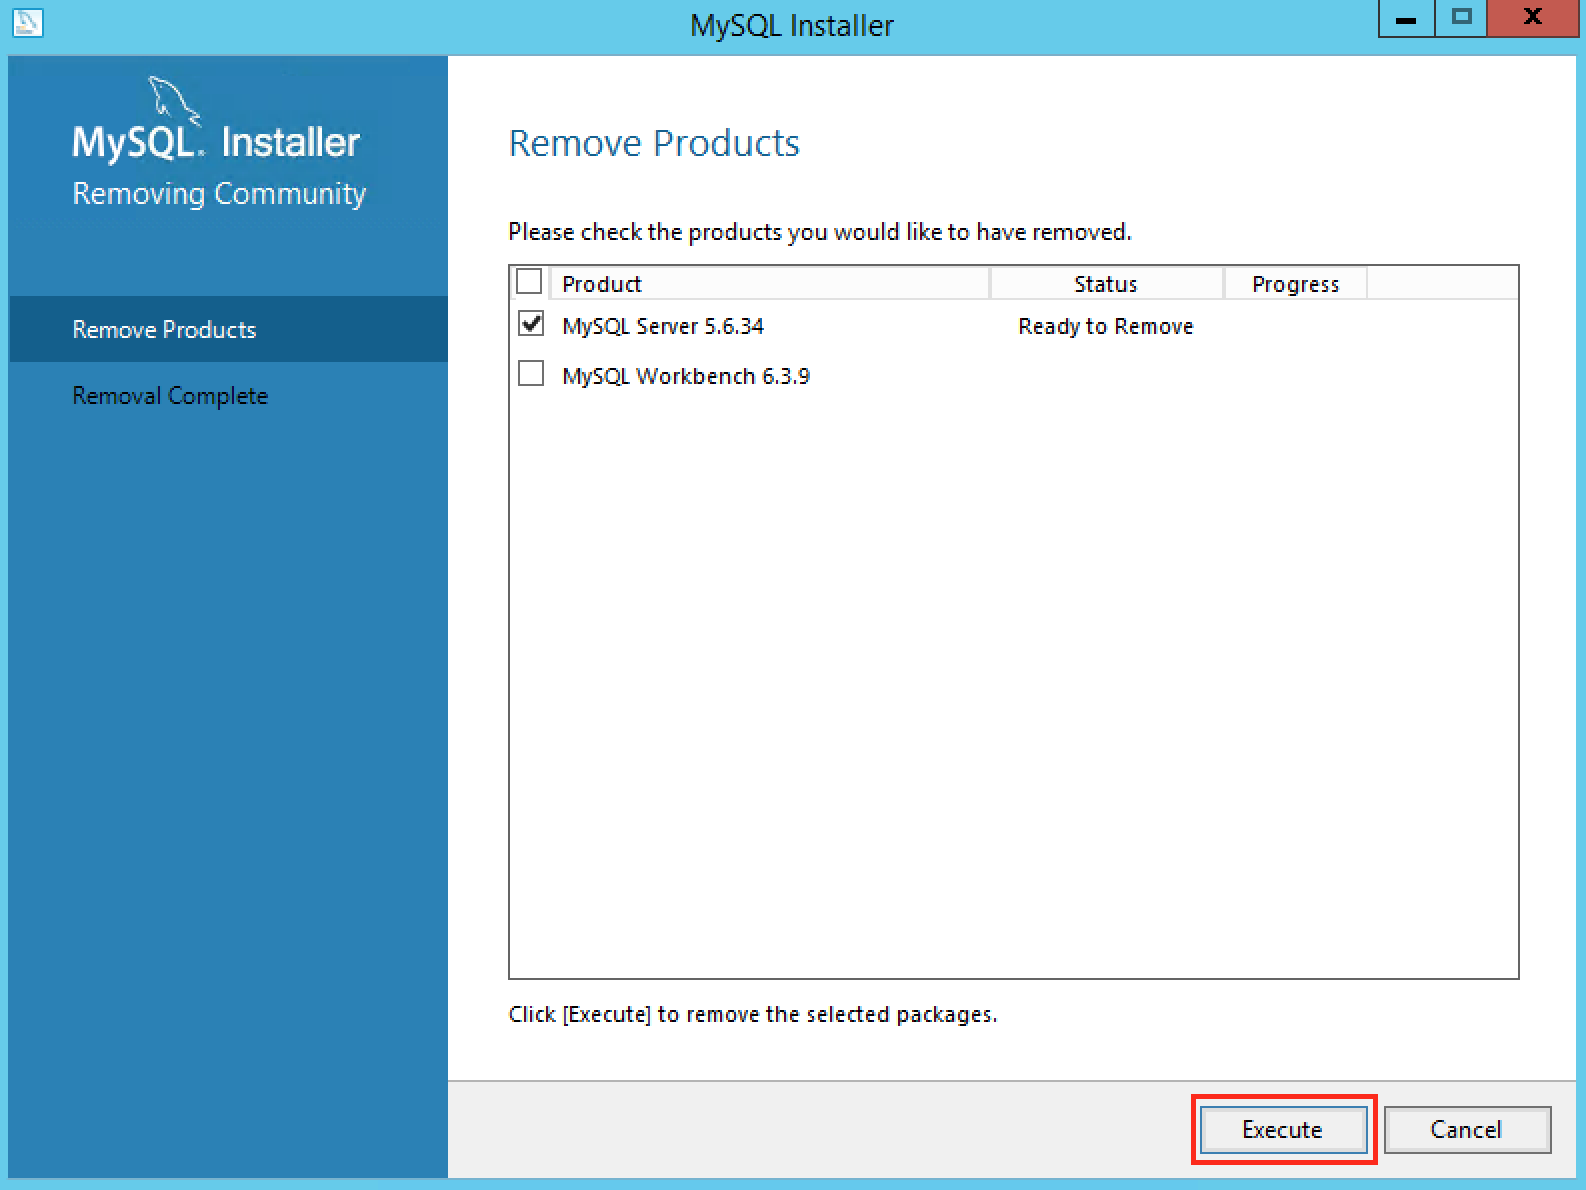
You’ll be asked if you want to remove the MySQL Data folder for MySQL Server 5.6. It contains your databases and configuration. It’s up to you if you wish to do this - there’s no harm leaving it behind apart from it taking up disk space. You did take a backup of the my.ini file in there, didn’t you?
Once the process is complete, if you’re prompted to reboot, do so.
Install MySQL Server 5.7
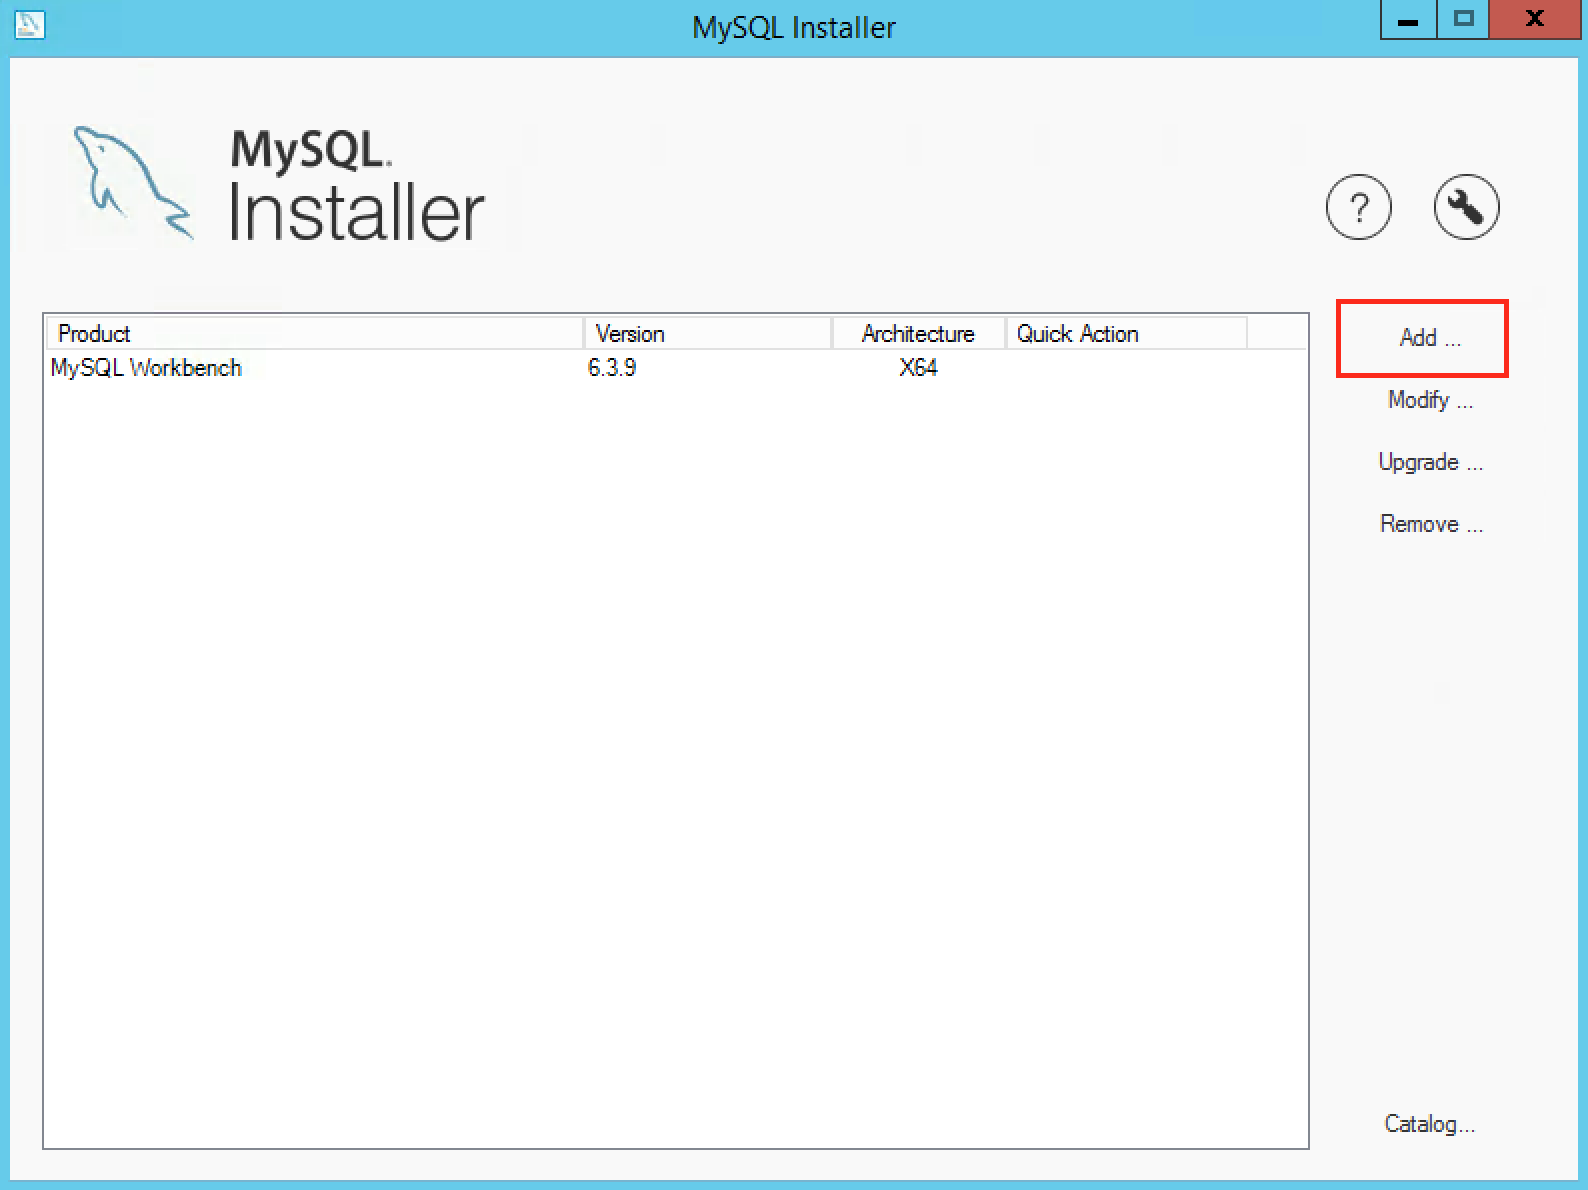
Run the MySQL Installer again - this time, you’ll see that MySQL Server has gone. Click Add…
Next, drill down the MySQL Servers category in the Available Products pane and select the current MySQL Server 5.7 version - you’ll probably want the X64 one unless you’re running a 32 bit Windows Server. Click the green arrow to add it to the list of Products/Features To Be Installed, then click Next:

Once you’re happy, click Execute to begin! MySQL Server will download and install. Once it’s done, you’ll see a summary of what’s happened. Click Next:
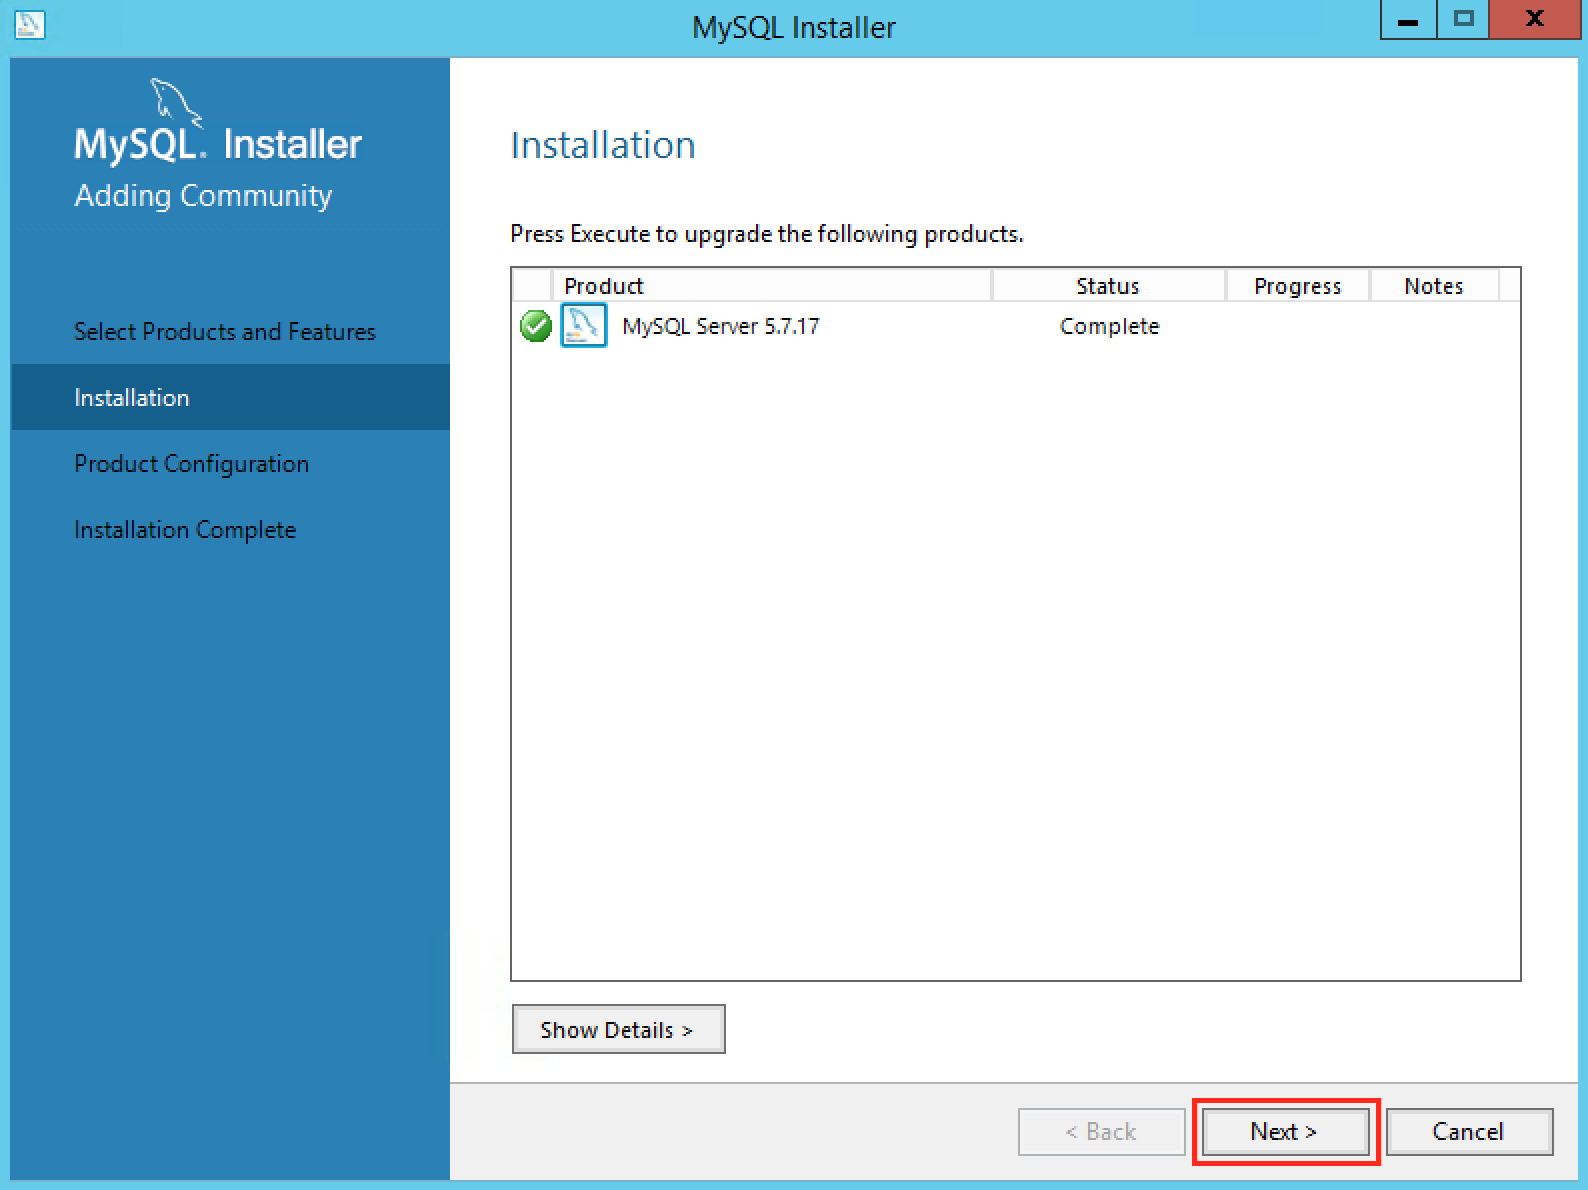
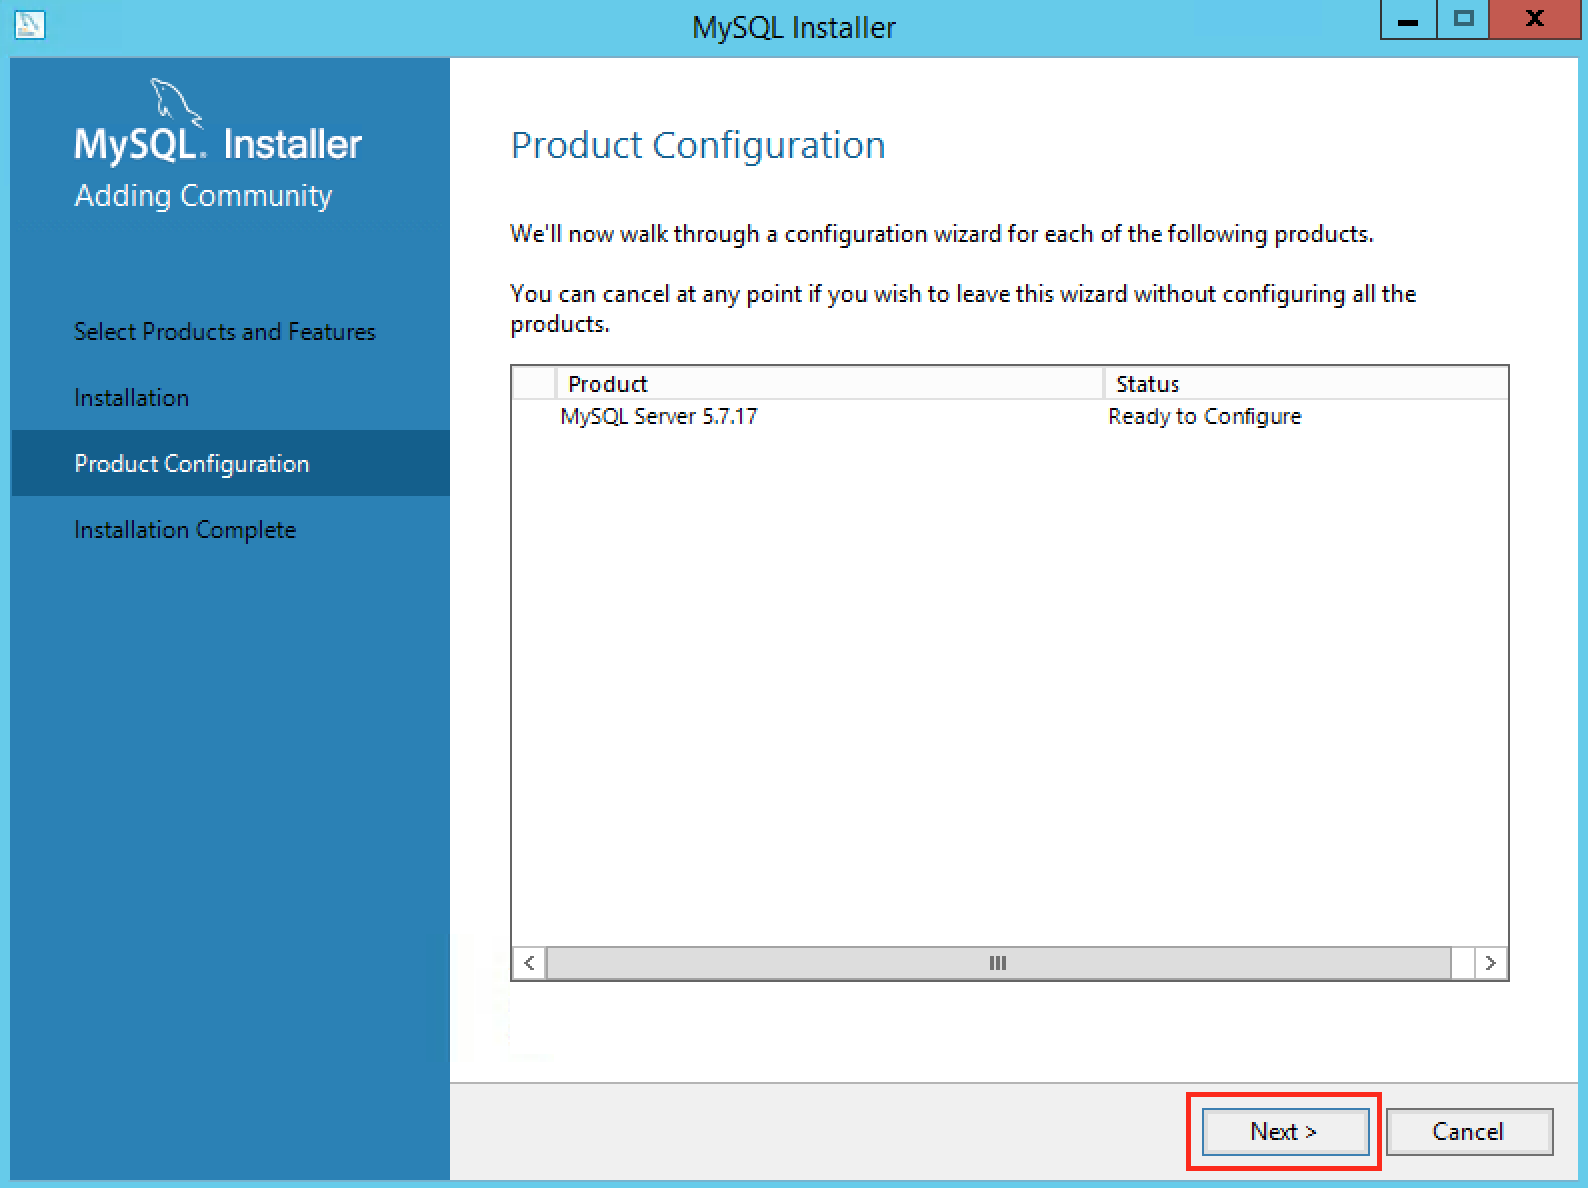
Let’s get this beast configured. Click Next again:
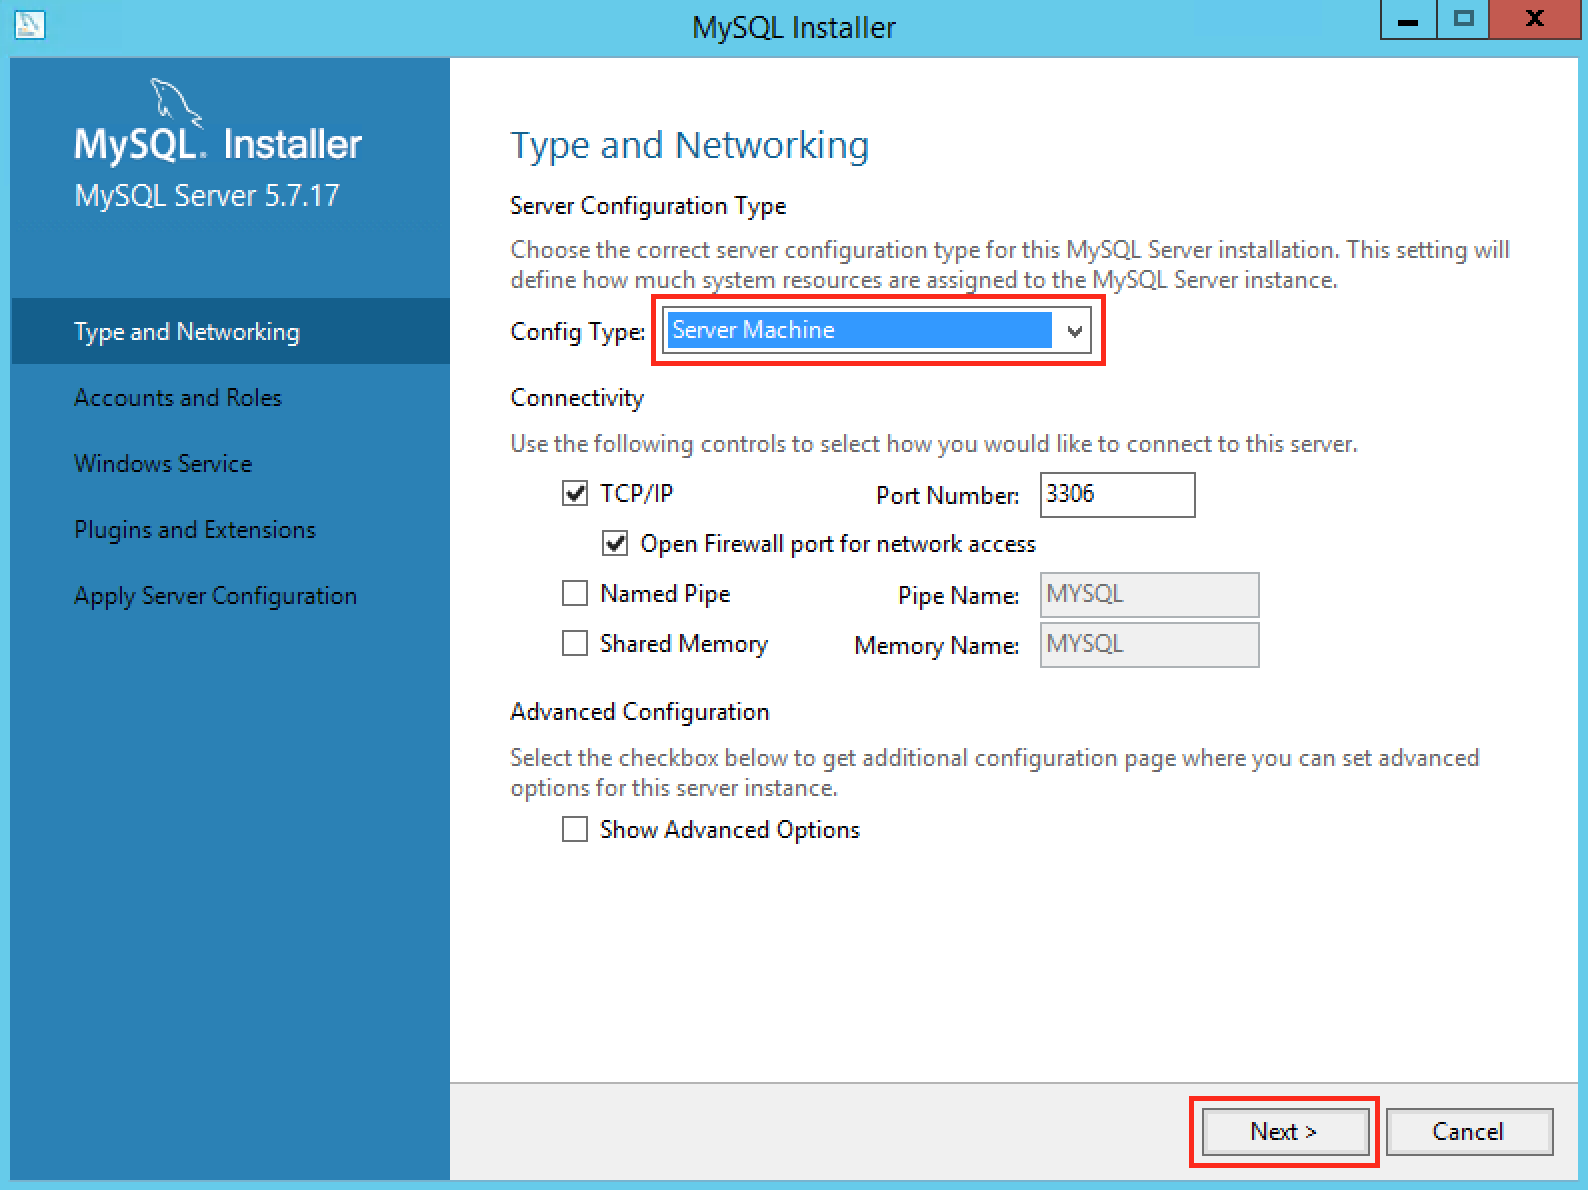
Change the Config Type to “Server Machine”. Leave everything else as-is (unless you know something I don’t!), then click Next:
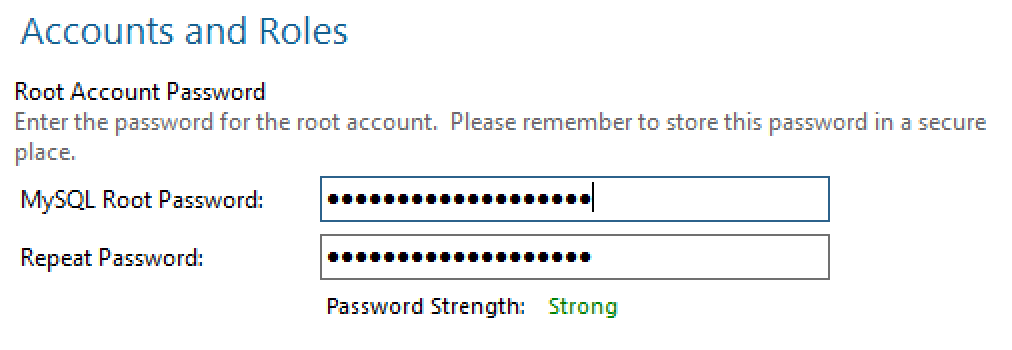
Now it’s time to create a password for the root account and set up a database user. The root password can be anything you like - if you know the one for the previous installation of MySQL Server 5.6, you could use that. Or you could change it. Make sure you document it though - I like using KeyPassX to store stuff like this.
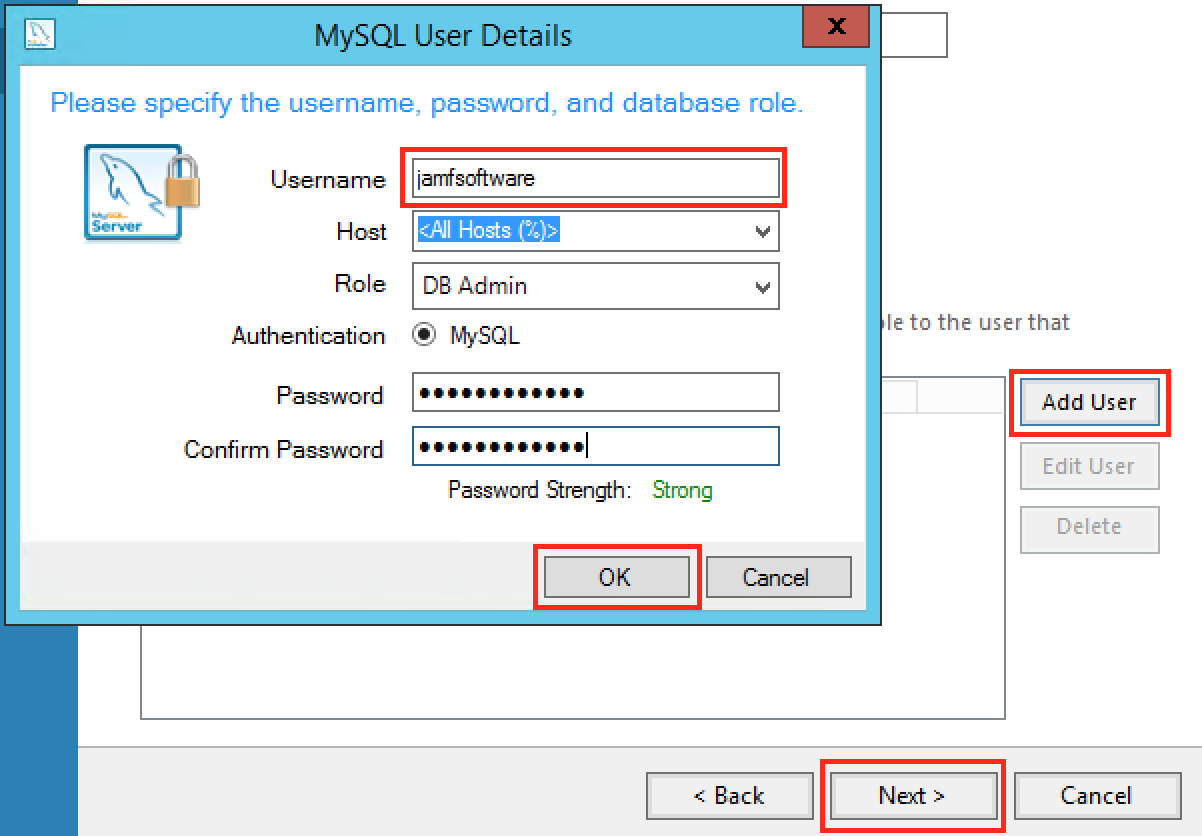
Next, create the database user that will be used by the JSS to access its database. It’s usually called ‘jamfsoftware’.
- Click Add User.
- Specify the correct Username (it’s normally jamfsoftware).
- Leave everything else as-is.
- Enter a password (this should be the same as the one you’ve used before when your JSS was initially set up).
- Click OK.
- Click Next.
Leave the Windows Service settings as-is (unless you know more than me!), click Next:

Leave the Plugins and Extensions alone (the JSS doesn’t do Document Store), click Next:

Now, click Execute and watch the magic happen! Once done, you should see this:
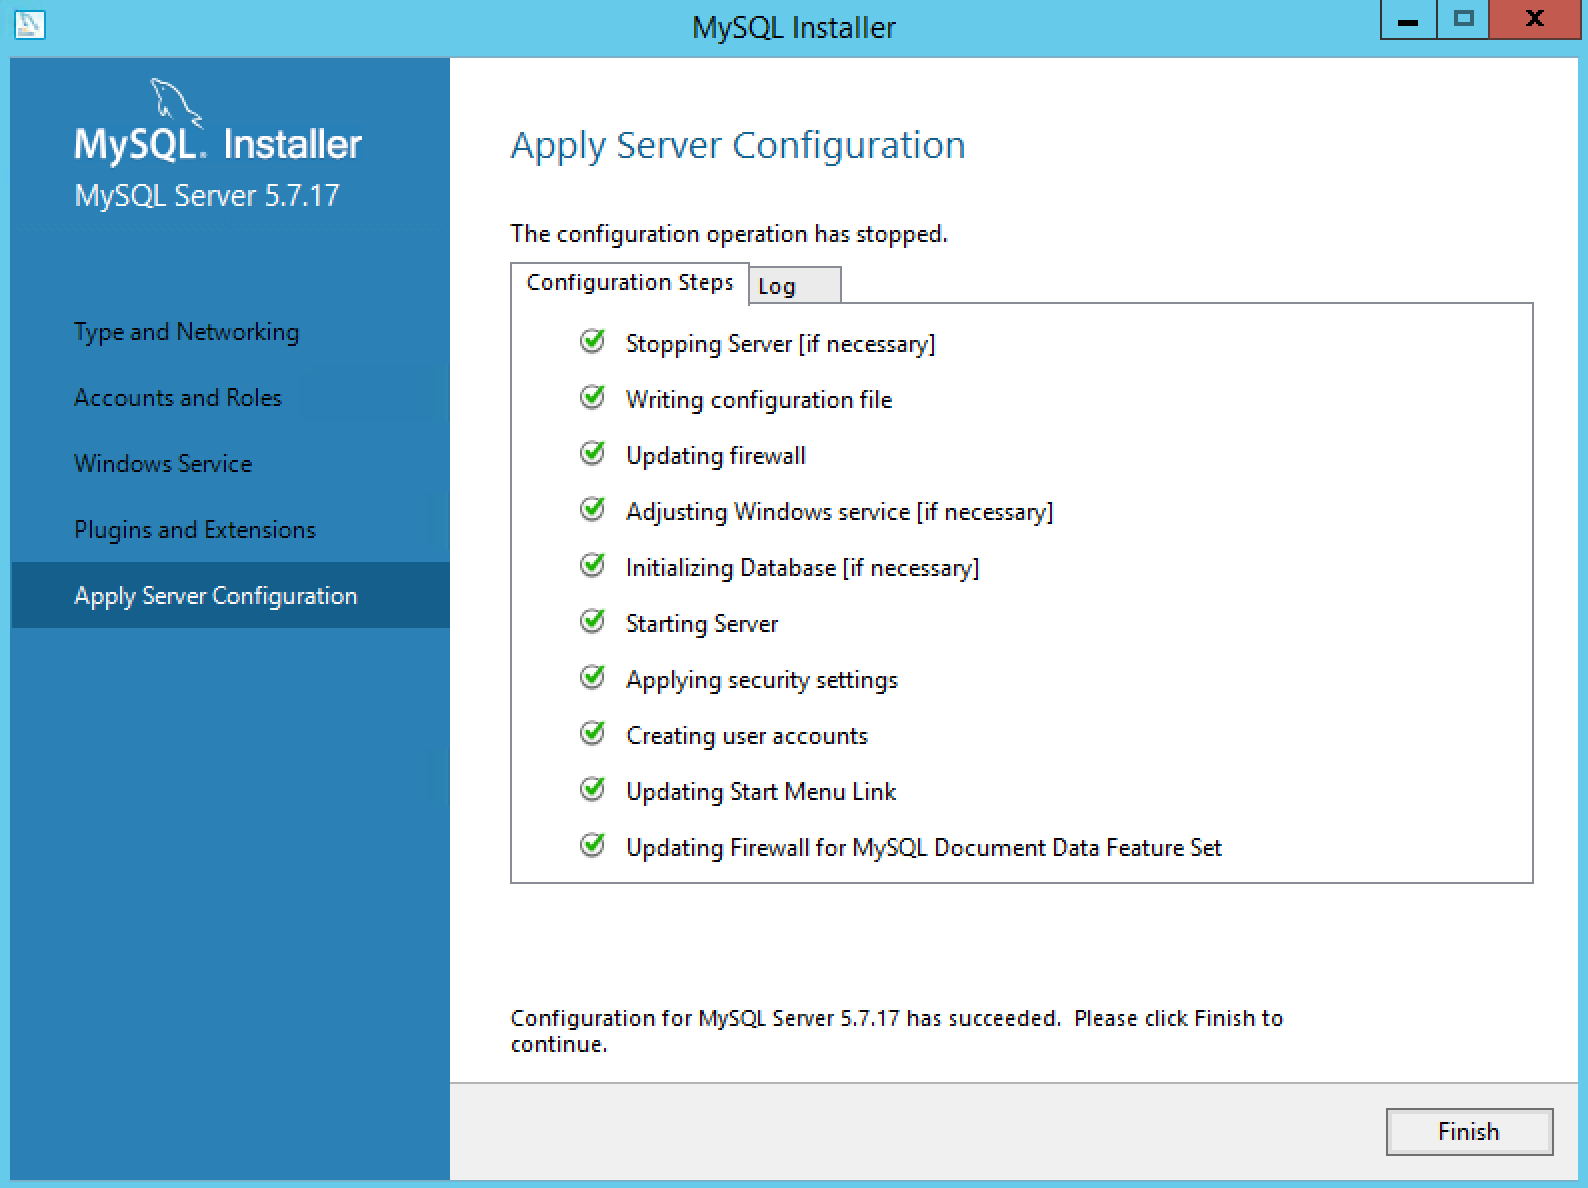
Click Finish and close the MySQL Installer.
Tweaking MySQL Server’s configuration
At this point, you may want to make changes to your MySQL Server setup (the stuff in my.ini). This is where your 5.6 configuration file backup might come in handy for reference.
The defaults needed tweaking for my environment - they may or may not for yours, or you may have something really funky going on where they’ll be entirely different (then why are you reading this, you know way more than me!). You’ll find that file here:
C:\ProgramData\MySQL\MySQL Server 5.7\my.ini
I really like using the Notepad++ text editor for Windows - when you save, it prompts to elevate itself to administrator which makes it easy to edit system files like this.
I had to make the following changes:
- Disable ‘no-beep’ (database backups would fail otherwise) - comment out line 62 - insert a preceding #:
# no-beep
- Disable Strict Mode (may not be necessary since version 5.6 and above, but no harm in doing so) - comment out line 106:
# sql-mode="STRICT_TRANS_TABLES,NO_AUTO_CREATE_USER,NO_ENGINE_SUBSTITUTION"
- Set the maximum number of connections - default is too low, this should be (Tomcat thread pool * 2)+1 - line 135:
max_connections=181
- Increase the maximum packet size to 512MB (database restores can fail and sometimes you can’t capture printers with Casper Admin) - line 287:
max_allowed_packet=512M
Finally, restart the MYSQL57 service (click Start, Administrative Tools, then launch the Services application to find it).
Recreating the JSS database and restoring it from the backup
Now that we have a brand new MySQL Server 5.7 installation, it won’t have a database for the JSS yet. We essentially need to follow the same process as if we were setting up a brand new JSS on a new server, starting with creating the database itself:
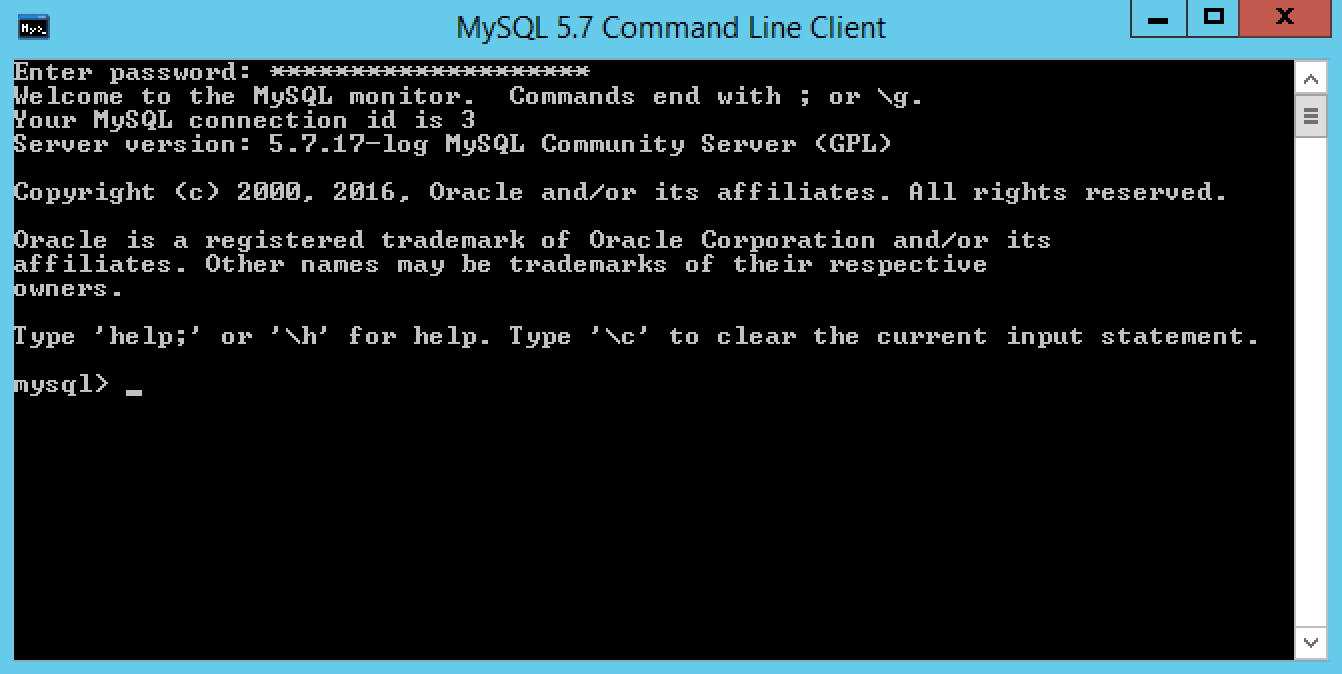
Launch the MySQL 5.7 Command Line Client (hint: click Start and type ‘mysql’ - it’ll appear). Next, enter the MySQL root password you set up during installation. You should see a mysql prompt like this:
Now let’s create that database. This is documented in Jamf’s installation guides but here’s what I did:
Issue the following command to create the database:
CREATE DATABASE jamfsoftware;
Next, add a GRANT to allow our jamfsoftware MySQL user on the same server access to it (change ‘password’ to the jamfsoftware account password you created earlier):
GRANT ALL ON jamfsoftware.* TO 'jamfsoftware'@localhost IDENTIFIED BY 'password';
Note that if your JSS is clustered, you’ll need to add additional GRANTs for each JSS webapp. That’s beyond the scope of this post but Jamf document it here: https://www.jamf.com/jamf-nation/articles/174/installing-a-jss-web-application-in-the-dmz
If you’ve done it properly, you should see “Query OK” statements after each command.
Now let’s use the JSS Database Utility to restore our backup. See the beginning of this post if you can’t remember how to launch it with elevated privileges. You’ll probably see this:
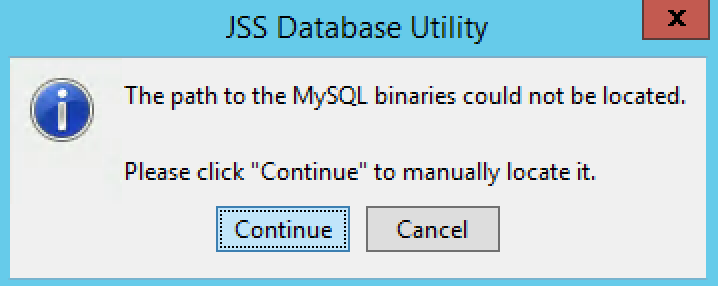
Click Continue and browse to C:\Program Files\MySQL\MySQL Server 5.7\bin and all should be well.
Click Restore Backup Now… and locate the database backup file you created earlier (the filename will contain the date and time, and have a .sql.gz extension):

This will take a little while - in my case it took about 10 minutes.
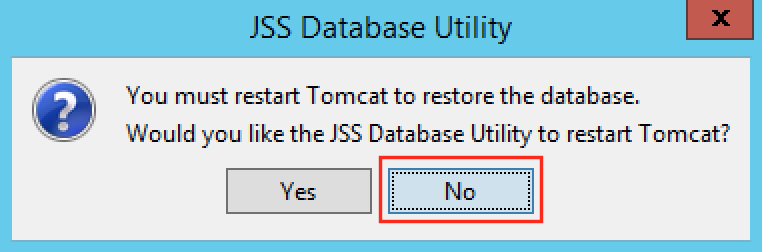
When you’re prompted to restart Tomcat, click No - we need to upgrade the database first.
Close the Database Utility and launch a new Command Prompt. Issue the following command, then enter your MySQL root password when prompted:
"c:\Program Files\MySQL\MySQL Server 5.7\bin\mysqlcheck.exe" -u root -p --auto-repair --optimize jamfsoftware
This will upgrade the database tables to MySQL 5.7’s standards as well as do some housekeeping.
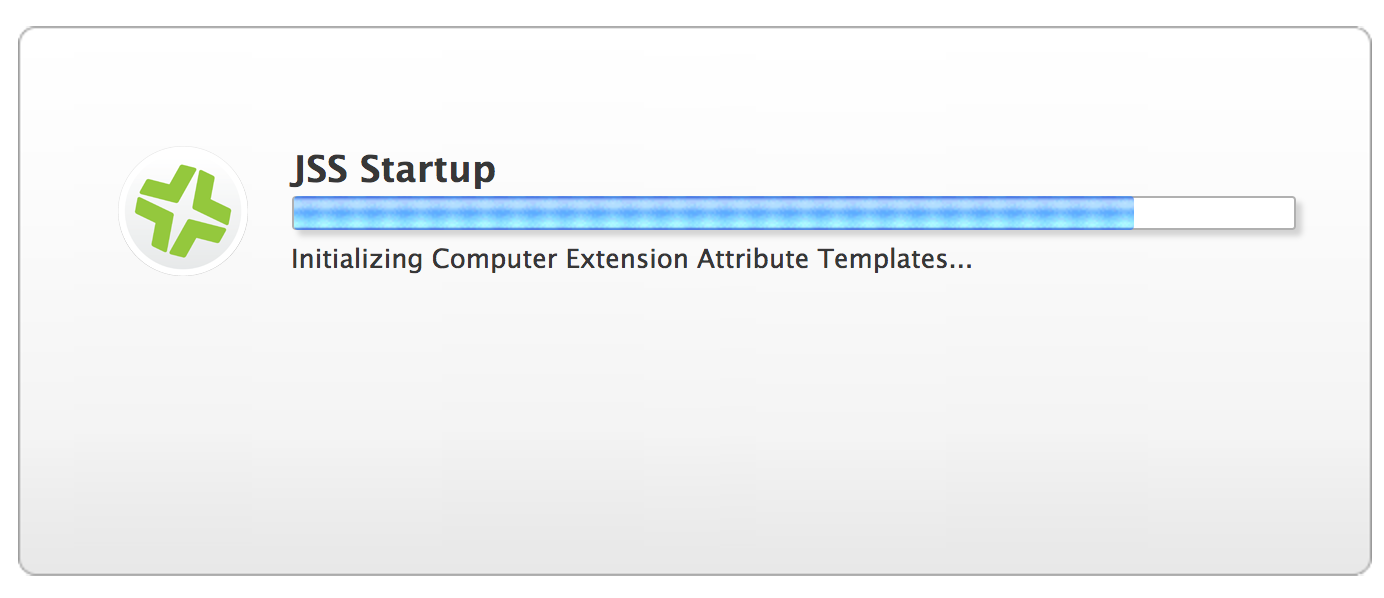
Now we can restart the Tomcat service - if you’re still following along, it’s called “Apache Tomcat 8.0 Tomcat8”!
Point a web browser at your JSS - if all went well, you’ll see it starting up (hold your breath!), then you should be able to log in:

Yes!
Lastly, to check that you are indeed running MySQL 5.7, log in to your JSS, click the settings cog in the top-right corner, then scroll down and click the JSS Summary icon. Create a summary and scroll down to see what the “version” line says. Here’s mine:
version .................... 5.7.17-log
Success!